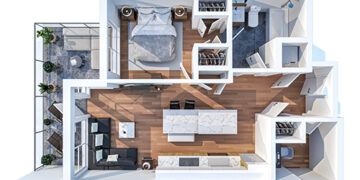
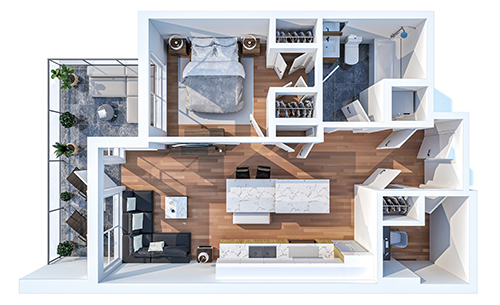
Creating 3D floor plans is an effective way for real estate professionals to showcase properties to potential buyers. These plans offer a realistic view of the layout, making it easier for buyers to visualize how they would live in the space. In this guide, we will walk you through the process of creating 3D floor plans, from gathering your tools to sharing your final design.
Step 1: Gather Your Tools
The first step to creating 3D Floor Plans for Real Estate is to choose the right software. There are several programs and online platforms designed specifically for this purpose, and many of them are user-friendly, even for beginners. Some popular options include:
- RoomSketcher: A straightforward tool that allows you to create detailed 3D floor plans without needing advanced design skills.
- Cedreo: Another great platform, ideal for professionals who need to create both 2D and 3D plans quickly and efficiently.
- SketchUp: A powerful design tool that offers more flexibility for creating detailed 3D floor plans, often used by architects and designers.
Most of these platforms provide a library of objects and finishes that make it easy to create realistic representations of rooms. They also offer features like drag-and-drop furniture placement and customization of materials.
Step 2: Create the Basic Layout
Once you have your software ready, the next step is to create the basic layout of the property. This involves inputting the dimensions of each room, using either existing blueprints or measurements you have taken. If you don’t have blueprints, you can measure the rooms yourself to ensure accuracy.
To start:
- Draw the perimeter of the property.
- Divide the space into different rooms.
- Mark the positions of doors and windows.
It’s important to be as precise as possible when creating the layout. A detailed and accurate representation of the space is crucial for buyers to get a sense of the property’s size and layout.
Step 3: Add Details
After laying out the rooms, the next step is to add details such as furniture, fixtures, and appliances. This step helps show how the space could be used in real life. Most 3D floor plan software has built-in libraries with a variety of furniture styles, appliances, and decor items that you can easily drag and drop into your layout.
Think about:
- Where the kitchen appliances will go.
- How the living room furniture will be arranged.
- Where the bathroom fixtures, like sinks and toilets, will be placed.
Adding these details gives potential buyers a better understanding of how the space could look when furnished. It also helps them envision how their own belongings could fit into the property.
Step 4: Customize Finishes
One of the best ways to make your 3D floor plan stand out is by customizing the finishes. Most software programs allow you to change the color and texture of walls, floors, and countertops. You can choose finishes that match the property’s existing style or opt for something that complements the current trends.
Here are a few areas to customize:
- Flooring: Choose from wood, tile, or carpet to reflect the actual floors in the home.
- Walls: Pick paint colors or wallpapers that show off the property’s personality.
- Countertops: Select materials like granite or quartz for the kitchen and bathroom countertops.
Customizing these elements adds a layer of realism to your 3D floor plan and helps potential buyers visualize the property more clearly.
Step 5: Generate the 3D View
Once you’ve completed the layout and added all the necessary details, it’s time to generate a 3D view of the property. This is where the floor plan really comes to life. Using the rendering feature of your software, you can create a virtual tour of the space, allowing potential buyers to see the property from multiple angles.
The 3D view should give a complete picture of the home, showing how different rooms connect and how the space flows. This is especially important for helping buyers understand the size and scale of the rooms, which can sometimes be hard to grasp from photos alone.
Step 6: Review and Adjust
Before finalizing your 3D floor plan, take some time to review it. Walk through the space virtually and check for any inaccuracies or areas that could be improved. Ask yourself the following questions:
- Are all the dimensions correct?
- Does the furniture fit properly in each room?
- Are the finishes realistic and visually appealing?
You can also get feedback from colleagues, clients, or other real estate professionals. They might notice details that you missed or suggest improvements that could make the plan even more effective.
Step 7: Share Your Floor Plan
The final step is to share your 3D floor plan with potential buyers. Most 3D floor plan software allows you to export the design in a variety of formats, such as high-quality images, PDFs, or interactive models. Choose the format that best fits your needs, whether you’re creating printed marketing materials, uploading the plan to a real estate website, or sharing it through email.
Here’s how you can share your 3D floor plan:
- Real Estate Listings: Upload interactive 3D floor plans to online property listings to attract more buyers.
- Brochures: Include detailed 3D floor plans in marketing brochures to give potential buyers a better sense of the property.
- Virtual Tours: Offer potential buyers the option to explore the property virtually through a 3D tour.
Sharing a detailed 3D floor plan not only enhances your marketing efforts but also makes it easier for buyers to connect with the property. It’s an excellent way to stand out in a competitive real estate market.
Conclusion
Creating 3D floor plans for real estate doesn’t have to be complicated. By following these simple steps, you can create realistic and engaging floor plans that help potential buyers visualize themselves in the property. From gathering the right tools to sharing your final design, every step plays an important role in presenting the property in the best possible light.


